Shadow-Spotter Next Gen Content Discovery
A comprehensive Shadow-Spotter guide for beginners that serves as a jump-start including an introduction to Content Discovery.

Disclaimer
This content is provided for educational and informational purposes only. The techniques and tools discussed, are intended to raise awareness about security risks and help developers and system administrators protect their systems.
We do not encourage, support, or condone any form of unauthorized access, exploitation, or malicious activity. All demonstrations were conducted in controlled environments with proper authorization.
Use this knowledge responsibly and always adhere to your local laws and ethical guidelines. Hacking should only be performed in environments where you have explicit permission.
The author assumes no responsibility for any damages or legal consequences arising from the misuse of this content. Always ensure you have proper authorization before testing or auditing any system!
What is Shadow-Spotter?
Shadow-Spotter is a modern alternative to the old content discovery tools that are no longer effective against the new generations of web applications and/or APIs
Based on the now-abandoned “kiterunner” from AssetNote, Shadow-Spotter is maintained by SNAKE Security with bug fixes and new features…
Shadow-Spotter is a tool that not only performs traditional content discovery at breakneck speeds, but also bruteforces routes/endpoints in modern applications.
As of this posting time, Shadow-Spotter is fully backward compatible with the old “kiterunner” and its “.kite” files.
Modern application frameworks such as Flask, Rails, Express, Django, and others follow the paradigm of explicitly defining routes that expect specific HTTP methods, headers, parameters, and values.
With traditional content discovery tools, these routes are often undetected, leading to false negatives!
Installing Shadow-Spotter
You can install Shadow-Spotter using AFOS-NG as it is part of the ANDRAX-NG Project, or you can install it manually on your preferred platform:
First download the source code from the official github repository https://github.com/snakesec/shadow-spotter
Next, execute the commands:
# Create the "dist" directory
mkdir dist
# Build Shadow-Spotter in the "dist" directory
go build -o dist/Shadow-Spotter ./cmd/shadowspotter
# Strip Shadow-Spotter's binary
strip dist/Shadow-Spotter
You should now have Shadow-Spotter up and running…
If you also want the “kitebuilder” (which is recommended) run the following commands:
# Create a python3 virtual environment for kitebuilder
python3 -m venv /opt/kitebuilder
# Activates the kitebuilder virtual environment in the shell
source /opt/kitebuilder/bin/activate
# Install the wheel package
/opt/kitebuilder/bin/pip3 install wheel
# Installs the packages required by kitebuilder
/opt/kitebuilder/bin/pip3 install -r UTIL-TOOLS/kitebuilder/requirements.txt
# Copy the kitebuilder package
cp -Rf UTIL-TOOLS/kitebuilder /opt/kitebuilder/package
The content of the kitebuilder launcher file:
#!/bin/bash
source /opt/kitebuilder/bin/activate
/opt/kitebuilder/bin/python3 /opt/kitebuilder/package/kitebuilder.py "$@"
You’re now ready to continue:
Content Discovery
In the CyberSecurity field it is very important to be good at discovering secrets, evaluating possibilities and exploiting flaws, none of this is possible if you do not know what you are dealing with. As testers, we need to know the basics of how the target system works, and understanding how it works is the step that determines which path we will take.
If we’re talking about web applications and/or services that operate under the HTTP protocol, our first step will be content discovery, which will allow us to find out things like: what technologies the application uses, what data protocols it provides, endpoints that are useful for us…
To clarify, a good example of tools that basically work on the content discovery mode are: gobuster, monsoon, cansina… but these tools are quickly becoming obsolete due to the new generations of web applications, I am not saying that they are useless!
But for now I can offer you something better!
For so long, the focus of content discovery has been on finding files and folders. While this approach is still effective for legacy web applications that host static files or respond with 3xx’s on a partial path, it is no longer useful for modern web applications, especially APIs.
Over the years, we have seen that a lot of effort has been put into making content discovery tools faster as possible so that they can handle larger wordlists, but the art of content discovery has not been innovated upon.
This is what the folks at AssetNote tried to do with kiterunner, which was an excellent tool, way ahead of its time, but unfortunately they gave up and abandoned development, at least the open source version, to continue with a proprietary, paid version ( Money talks! )
The truth is that kiterunner had no chance in its time, the testers in question still did not care about the future… it was only with the introduction of more complex tools focused on new generations of systems, such as those developed by Project Discovery and the creation of a platform such as ANDRAX-NG, that the professionals turned their eyes to the systems that were and would be emerging, as some of you may have realized, 99% of the “professionals” out there are outdated!
I couldn’t let such an injustice (although the discontinuation of the kiterunner is more about money than giving up…) happen to such a promising class of tools, so I started to develop a tool based on the original code, which I will try to keep up to date, a new name is needed in case they decide to maintain the kiterunner again some day.
Legacy Content Discovery
Typically, the vast majority of content discovery tools use a wordlist with multiple paths, so the tool will test them one by one and return a positive or negative result based on the HTTP code that the application returns or some content in the response body or headers…
This is a basic example of a word list that is used by a common tool:
/api/users
/api/posts
/api/comments
/api/products
/api/orders
/api/profile
/api/auth/login
/api/auth/logout
/api/admin/users
/api/admin/settings
As you can see, it’s a very simple thing that was useful for a long time, but not anymore! Most tools allow us to specify parameters such as HTTP method, cookies and so on… but is this really useful? Let’s think about it…
Let’s imagine that most entries accept the GET method but /api/orders only accepts POST, /api/profile and /api/admin/settings only accept PUT and things get even worse, each requires a unique parameter, something like: order id, user id, admin configuration parameter… What do you do if using a legacy tool?
Your test will fail because current tools can’t handle dynamic applications…
That’s what I’m trying to explain…
It’s time to evolve and for that you can’t live in the past, especially not with old and outdated platforms which insist on maintaining and propagating the use of tools that are becoming useless today!
Basic usage
Shadow-Spotter has 3 main commands: scan, brute and kb.

- ➢ The brute command allows Shadow-Spotter to operate as a “legacy” content discovery tool using a simple word list.
- ➢ The scan command is where the magic happens, here we specify the “.kite” file containing the data for a dynamic scan.
- ➢ On the other hand, the kb command is responsible for manipulating files generated by the kitebuilder tool.
These commands have sub-commands, which can be listed by puting “--help” in front of the command.
Brute command
As mentioned, Shadow-Spotter allows users to scan as if they were using an old tool. A common use of the brute command in Shadow-Spotter would be something like this:
Shadow-Spotter brute "http://127.0.0.1:5000" -w old-list.txtThis command results in something like this:

We need to pay attention to the settings used:
- ➢ delay : Delay between each request, the default is 1 second (1s), but you can specify any value using the --delay flag, something like 1s, 1m, 1h… values can be combined, like 1h30m15s
- ➢ full-scan : Boolean variable that refers to whether Shadow-Spotter will run a full scanner or not (Does not apply to the “brute” command).
- ➢ full-scan-requests : Indicates how many requests will be made in a full scan (the brute command always performs a full scan).
- ➢ headers : Values that are passed through the --header flag (-H); by default, “x-forwarded-for:127.0.0.1” is used.
- ➢ max-conn-per-host : Maximum number of concurrent connections per host, default is 3, can be changed with the --max-connection-per-host (-x) flag.
- ➢ max-parallel-host : Max number of hosts to scan simultaneously, default is 50, can be set with the --max-parallel-hosts (-j) flag.
- ➢ max-redirects : Maximum number of redirects to follow, 3 by default, use the --max-redirects flag to change it.
- ➢ max-timeout : The time to wait for a response to each request, 3 seconds by default, the --timeout flag (-t) should be used to specify a new value, the value follows the same principle as the --delay flag.
- ➢ preflight-routes : The preflight does some tests before the real scan starts, this is the information about how many routes will be used, the preflight can be disabled with the --disable-precheck flag.
- ➢ quarantine-threshold : If the host returns N consecutive matches, it is quarantined as a wildcard, default is 10, can be disabled by setting it to 0 with the --quarantine-threshold flag.
- ➢ read-body : Shadow-Spotter uses this variable internally only.
- ➢ read-headers : Shadow-Spotter uses this variable internally only.
- ➢ scan-depth : Variable responsible for how deep preflight should go, can be disabled by setting the --preflight-depth flag to 0, so that only the docroot (“/”) is checked (if preflight is not disabled).
- ➢ skip-preflight : It is only an indication of whether the preflight is active or not.
- ➢ status-code-whitelist : It tells you which HTTP status codes are treated as success codes, the defaults are: “200,301,302,403,500,100,300,401,405” New codes can be set with the flag: --success-status-codes
- ➢ target : The target being tested.
- ➢ total-routes : How many routes to test in the current configuration.
- ➢ user-agent : The user-agent that will be used in the test, the default is to generate a random user-agent, but you can specify your own user-agent with the flag: --user-agent
Scan command
To perform the scan we need a .kite file. A .kite file is a file with the kitebuilder schema compiled and optimized for execution.
Shadow-Spotter scan "http://127.0.0.1:5000" -w test.kitetest.kite is our compiled file based on the kitebuilder schema. You will notice that many things are different and very specific here, some options, even if not mandatory, will completely affect the results of our test.

I won’t go into detail about all the variables because we already talked about them in the “Brute command”, but we have 2 new ones here in the scan command…
- ➢ kitebuilder-apis : This is the file generated by kitebuilder that contains the apis and their routes.
- ➢ quick-scan-requests : Information on how many routes are available for Quick Scan testing.
Let’s look at the following line: “Continue Scanning with full wordlist? [y/n]”. Here we see that Shadow-Spotter asks the user if they want to proceed with a full scan, because the quick scan only tests one route per API, if this route fails we are 90% sure that the API is not used on the target host… however, performing a full test may be prudent in a custom application…
1276aa98776040efbb1f8a5a5fc54055524a613a is the *ksuid* of the API to which the route belongs.
Kb command
Here we will manipulate the kitebuilder schema by converting the file formats and compiling them into .kite files. We can also parse the files generated by kitebuilder directly, so we can quickly and easily analyze what is being tested.

The “compile” subcommand is what we use to convert a JSON file created by kitebuilder into a .kite file, which is the compiled schema itself…
The “parse” subcommand is useful for validating the JSON file generated by kitebuilder, with which we can easily see the available APIs and their respective routes with the HTTP methods to be used…
“convert” has some interesting use cases, such as converting an old wordlist into a .kite file that can be used by the “scan” command, and also converting a .kite file back into JSON so that the content can be edited or extended…
As you will see, “replay” is an important part of Shadow-Spotter!
Kitebuilder
kitebuilder is a utility that converts OpenAPI/Swagger specification files into a specific schema to be used by Shadow-Spotter, it was originally developed by AssetNote for Kiterunner but abandoned in OpenAPI 2.0 as well…
The version of Kitebuilder shipped with Shadow-Spotter is the updated version with OpenAPI3 support and other bug fixes…

The main goal of kitebuilder is to take a directory of OpenAPI/Swagger specification files, whether they are 2.x, or 3.x… in JSON or YAML format, and convert everything into a single JSON file ready to be compiled and used by Shadow-Spotter…
OpenAPI/Swagger
The OpenAPI Specification is a specification for a machine-readable interface definition language for describing, producing, consuming, and visualizing web services, previously known as the Swagger Specification.
Formerly part of the Swagger framework, it became a separate project in 2015, overseen by the OpenAPI Initiative, an Open Source collaborative project of the Linux Foundation.
Based on OpenAPI we can get the most accurate results on any API/Web Platform even if it is dynamic…
OpenAPI/Swagger supports both JSON and YAML definitions, kitebuilder can parse both formats thanks to the dynamic data structure processing of the Python Programming language.
Swagger 2.0 vs OpenAPI 3.x
We have a hell of a problem here…
The differences between one version and the other are not that severe, writing a parser for one or the other is not that complicated, but writing a parser that works reasonably well in both specifications at the same time… well, that’s a bit of a pain in the ass.
It took me 3 days (actually my free time during those days) to adapt the original Kitebuilder code to support Swagger and OpenAPI at the same time.
The work isn’t 100% done yet, but I can assure you that the 75% is more than enough to meet Shadow-Spotter’s requirements at the moment.
All right, we’ve talked a lot about Swagger and OpenAPI, but what does a Swagger specification file looks like?
I will compare the main differences between the Swagger and OpenAPI specifications in an easy way, check the examples:
This is a simple Swagger specification for a sample API using JSON:
{
  "swagger": "2.0",
  "info": {
    "version": "1.0.0",
    "title": "Simple API",
    "description": "Swagger API example"
  },
  "basePath": "/api/v1",
  "schemes": [
    "http"
  ],
  "paths": {
    "/user": {
      "post": {
        "summary": "Create user",
        "description": "Create new user",
        "consumes": [
          "application/json"
        ],
        "parameters": [
          {
            "in": "body",
            "name": "body",
            "description": "User data",
            "required": true,
            "schema": {
              "type": "object",
              "properties": {
                "id": {
                  "type": "integer",
                  "format": "int64"
                },
                "username": {
                  "type": "string"
                }
              }
            }
          }
        ],
        "responses": {
          "200": {
            "description": "Successful operation"
          }
        }
      }
    }
  }
}
However, since YAML is considered more readable than JSON, we will see YAML used more frequently.
Here’s the same API schema but written in YAML:
swagger: "2.0"
info:
  version: "1.0.0"
  title: "Simple API"
  description: "Swagger API example"
basePath: "/api/v1"
schemes:
  - "http"
paths:
  /user:
    post:
      summary: "Create user"
      description: "Create new user"
      consumes:
        - "application/json"
      parameters:
        - in: "body"
          name: "body"
          description: "User data"
          required: true
          schema:
            type: "object"
            properties:
              id:
                type: "integer"
                format: "int64"
              username:
                type: "string"
      responses:
        200:
          description: "Successful operation"
As we can see, using YAML instead of JSON is actually easier to read, even if there are no changes to the schema, the “smaller” syntax is useful when working with very large specifications.
From now on, we will prefer to use YAML over JSON, except in cases where the targeted file really needs to be a JSON file.
Now let’s see how the same API would be specified using OpenAPI 3.1.0:
openapi: 3.1.0
info:
  version: "1.0.0"
  title: "Simple API"
  description: "OpenAPI example"
servers:
  - url: "/api/v1"
paths:
  /user:
    post:
      summary: "Create user"
      description: "Create new user"
      requestBody:
        required: true
        content:
          application/json:
            schema:
              type: object
              properties:
                id:
                  type: integer
                  format: int64
                username:
                  type: string
      responses:
        '200':
          description: "Successful operation"
It is clear that we have some differences here, so let’s go through them:
- ➢ swagger: “2.0” is now openapi: “3.1.0”.
- ➢ basePath and schemes no longer exist, they are now specified within the “servers” field which houses a list of objects.
- ➢ In OpenAPI3 to specify a parameter in the “body” you must use the “requestBody” field where you specify what the api “consumes” as an object and then specify the schema with everything that will be used in the body of the request.
There are other differences, but they are not relevant to Shadow-Spotter because the kitebuilder only deals with fields that are useful to us!
You should follow the OpenAPI specification to create files compatible with kitebuilder, you can find the OpenAPI documentation here: https://spec.openapis.org/oas/latest.html
Advanced usage
Here we are, now, let’s get to the part of you’re really interested in…
From now on, I will assume that you are at least somewhat capable as a Bug Hunter or Penetration Tester, as I will be using more specific terms, methodologies, and examples.
Manipulating files
Let’s take the example of the simple API presented before, we will save it as YAML file format in a directory named “workdir”.
Then we can use kitebuilder to create a valid schema for Shadow-Spotter. The command syntax looks like this:
kitebuilder parse --scrape-dir workdir --output-file simple-api-test.jsonThe --scrape-dir flag argument is the directory where our Swagger/OpenAPI specification file is located, there can be more than 1 file (each file is treated as a different API), and the files can be in either YAML or JSON.
The argument to the --output-file flag is the file that we are going to save with the correct schema so that Shadow-Spotter can process it.
This is the result produced by kitebuilder… it has transformed our OpenAPI 3.1.0 specification into a format recognizable by Shadow-Spotter, we can see that kitebuilder does not integrate unnecessary fields, but expands fields like “parameters”:
[
  {
    "ksuid": "128d3f7dcca0101812d8e789374b224802f92f4e",
    "url": "/api/v1",
    "securityDefinitions": {},
    "paths": {
      "/user": {
        "post": {
          "description": "Create new user",
          "operationId": null,
          "parameters": [
            [
              {
                "name": "id",
                "in": "body",
                "description": "null",
                "required": true,
                "schema": {
                  "type": "integer",
                  "format": "int64"
                }
              },
              {
                "name": "username",
                "in": "body",
                "description": "null",
                "required": true,
                "schema": {
                  "type": "string"
                }
              }
            ]
          ],
          "consumes": [
            "application/json"
          ],
          "produces": null
        }
      }
    }
  }
]
It is also possible to notice the presence of a field called “ksuid” which is generated uniquely for each API in the file. ksuid will be useful for identifying the API when using Shadow-Spotter.
If you are not a programmer who wants to contribute to the development of Shadow-Spotter, it is not necessary to understand the structure of the files generated by kitebuilder, because Shadow-Spotter handles all data in the most precise and dynamic form as it can.
Now that we have created a useful schema for Shadow-Spotter, we can use it directly.
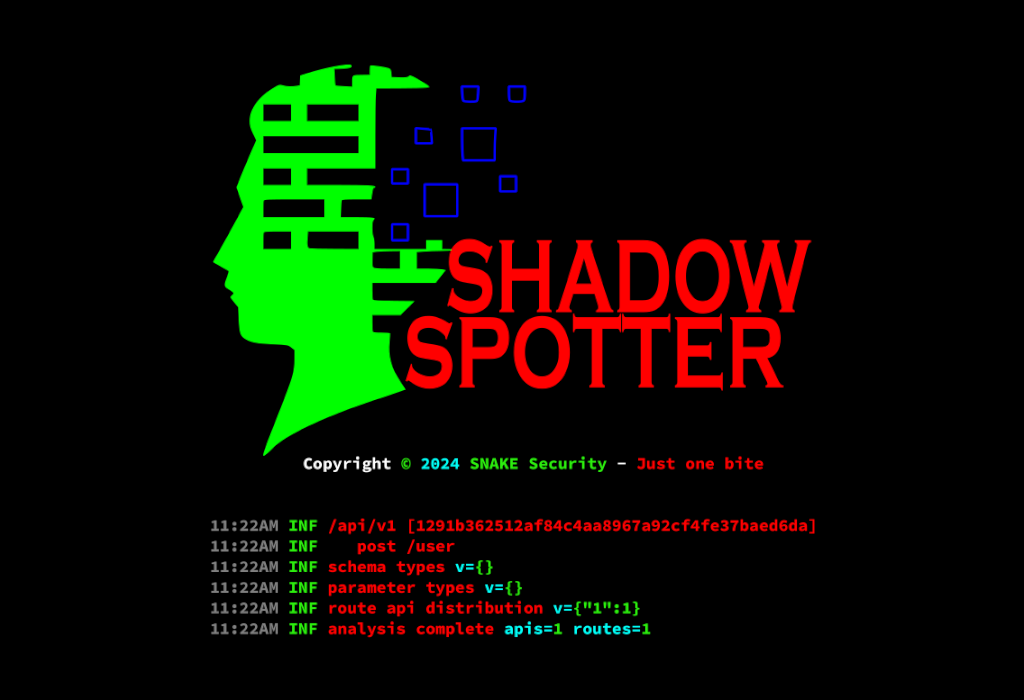
The first thing I like to do when I have a new scheme is to parse the file to see what Shadow-Spotter will read and how it will process it…
Shadow-Spotter kb parse simple-api-test.jsonThis command will produce output similar to the following:

- ➢ /api/v1 [1291b362512af84c4aa8967a92cf4fe37baed6da] is the “url” defined in “servers” or in “basePath” along the ksuid generated by kitebuilder to identify the API.
- ➢ post /user is a route with the POST method in the /user path.
- ➢ v={“1”:1} here you can have a look at the distribution of routes between APIs.
- ➢ apis=1 routes=1 it tells us how many APIs and how many routes there are in the file.
Now we have to optimize the schema generated by kitebuilder, we’ll do this by compiling it into a .kite file that will be used by Shadow-Spotter during the scan.
Shadow-Spotter kb compile simple-api-test.json simple-api- ➢ simple-api-test.json is the schema file generated by kitebuilder.
- ➢ simple-api is the name of the optimized .kite file that we will create.
Note that since we didn’t add the .kite extension to the filename, Shadow-Spotter will display a warning and add the extension itself.
“convert” is a very powerful subcommand that we will probably use at some point, since one of the main focuses of file manipulation is conversion between formats…
Let’s imagine that we already have a .kite file, we want to make some changes, but we have lost the source file generated by kitebuilder… in this specific case we can use the “convert” subcommand to turn our .kite file to .json, so we can make the changes and then compile it back to .kite.
Shadow-Spotter kb convert simple-api.kite output.json- ➢ simple-api.kite is the source file we want to convert.
- ➢ output.json is the converted file we want to save.
The result is something like:

Note that Shadow-Spotter expects the filename to include the extension that indicates what the file is or will be… for example: .txt, .json, and .kite.
Tip: You can use the txt format to convert a JSON file with kitebuilder schema or an optimized .kite file into a legacy wordlist for use in old tools… you can also use a legacy .txt file by converting it into a pseudo kitebuilder schema, allowing you to optimize it into a .kite file.
Scan precheck
The precheck functionality can be a little confusing to understand, but I can assure you that it’s not complex and it’s extremely effective!
This function is enabled by default…
Let’s see what happens when we run a basic scan with the following command:
Shadow-Spotter scan 127.0.0.1:5000 -w simple-api.kiteOn our Flask test server, the result of the requests will look something like this:

It may looks silly, but precheck performs some interesting checks such as:
- ➢ GET /4d55556f0efa4cf0/7ba339ca70d141c9 is the result of 2 uuids cut to 16 characters each and joined by a “/”.
- ➢ GET / and POST / just try a simple detection in docroot…
- ➢ GET /AAAAAAAAAA… is a test (destructive, mind you!) to see if the server can take a big URL buffer hit.
- ➢ GET /auth… it’s an authentication test using HTTP’s “Basic Authentication”, it sends a header like this “Authorization: Basic Mtox”.
The other tests are some variations and it is also possible to see that the “/user” route is being used with the increment of the basic tests…
It can ( and in most cases should ) be disabled by passing the flag: --disable-precheck
Full scan
By default, Shadow-Spotter does not perform a full scan, it performs a “quick scan” to test the active APIs, Shadow-Spotter takes a route from each API defined in the .kite file to check if it is active or not, the final scan is only performed on the APIs that have routes found.
If none of the APIs have returned a valid result, an error similar to the following will be displayed, along with a prompt asking you if you want to perform a full scan:

However, if you want to do a “Hail-Mary” kind of scan, you can pass the flag --kitebuilder-full-scan, which forces Shadow-Spotter to test every route in the schema file generated by kitebuilder.
Scan speed
Shadow-Spotter is designed to scan at extremely high speed, it is possible to run with about 20000 goroutines, but this is not a good idea, running at this speed can cause bottlenecks and performance degradation if you are not using a powerful machine and network.
And we’re not even taking into account the target’s IDS/IPS, which will scream at your requests and give you nothing but false positives or negatives…
But don’t worry, Shadow-Spotter is prepared for this, one of the things I fixed was the “delay” that simply didn’t work in kiterunner… (sounds like this was done on purpose…).
You can specify a delay value with the --delay flag, something like 1s, 1m, 1h… values can be combined, like 1h30m15s… default is 1s between requests.
Note: When testing high-security applications, keep in mind that the delay does not affect the precheck…
--max-connection-per-host (-x) is the maximum number of concurrent connections open on a single host, the default is 3. I recommend that you keep this to a maximum of 5, as depending on the target, this will represent approximately 1 to 5 requests per second for each connection.
--max-parallel-hosts (-j) maximum number of targets to scan at the same time, the default is 50, but we recommend checking that the hosts are on the same network (server), if necessary set a value inferior to this to avoid WAFs, IDS/IPS…
--timeout (-t) maximum time to wait for each request to return a result, the default is 3s, but if you want a faster scan on a very slow host, decrease this value, but this may result in false negatives…
Headers and queries
Some tests will require you to specify custom queries and/or headers. Shadow-Spotter has options to deal with that, unlike its predecessor, kiterunner, which was more passive and relied entirely on the wordlists rules.
By default, an “x-forwarded-for: 127.0.0.1” header is automatically sent, which is useful for bypassing WAFs on misconfigured systems… it is highly recommended that you keep this header in place for any new additions…
To add new headers to requests, use the --header (-H) flag. There are two ways to add multiple headers, one is to use a comma between each header and the other is to use multiple flags, see the examples below:
Shadow-Spotter scan 127.0.0.1:5000 -w simple-api.kite --header "x-forwarded-for: 127.0.0.1" --header "hacker-name: ghost"Shadow-Spotter scan 127.0.0.1:5000 -w simple-api.kite --header "x-forwarded-for: 127.0.0.1,hacker-name: ghost"Note: if you use the comma method, don’t leave a space between it and the next header, otherwise the headers won’t be processed correctly…
The user agent is another very important part of the header that was intentionally dropped in kiterunner, however, Shadow-Spotter has not only implemented an option to correctly define the user agent, but also created a random selection method to be used if not specified by the user.
You can specify a user agent by using the --user-agent flag, as in the following example:
Shadow-Spotter scan 127.0.0.1:5000 -w simple-api.kite --user-agent "Mozilla/5.0 (X15; Linux ARM128;rv:250.0) Gecko/31211212 Firefox/250.0"Queries, by the way, are also very important parts of the request; the number of APIs that work with parameters in the URL, whether for authentication or routing, is huge.
Obviously “they” knew this, but to favor their “premium” product, they never implemented this functionality in kiterunner and even ignored the “issues” that were opened in the github repository. I, on the other hand, decided to implement the logic to use custom queries.
You can add custom queries with the --custom-query flag, as in the example below:
Shadow-Spotter scan 127.0.0.1:5000 -w simple-api.kite --custom-query "name=l33t"In the example above, a query called “name” with parameter “l33t” will be inserted into the URL of each request.
Filters
Even if you think of yourself as a “data hacking Jedi” at some point you are going to need to use some filters to make your job easier.
Perhaps our most important filter is the Dangerous Request Blocking filter… I know it sounds like I’m bitching about the kiterunner devs too much, but these freaks almost killed me… Let me tell you a story…
My first contact with kiterunner was when I had to do some emergency work on a military base of an alternative army, if you know what I mean… I didn’t have time to set up my usual tools or even write a script to test the communication system’s API… I’d heard about kiterunner, quickly downloaded the code, compiled it and boom.
The stupid tool didn’t filter anything, it just sent everything, even requests that could totally destroy the application, like PUT and DELETE… luckily I noticed it and immediately aborted the execution, after all, a shot in my pretty face wouldn’t be good!
Perhaps that was the most important reason for the creation of Shadow-Spotter.
By default, we block PUT, PATCH and DELETE methods from being sent. If you want to test these methods, use the --allow-unsafe flag, which will allow the engine to process and send these requests along with the others.
If you need to test only whether the routes of a single API exist in the target, but your wordlist has multiple APIs, you can use the --filter-api flag.
Shadow-Spotter scan 127.0.0.1:5000 -w simple-api.kite --filter-api 12989307a904694ebee43882058861a6311cec2b12989307a904694ebee43882058861a6311cec2b is the ksuid of the API we want to filter.
When testing large applications or using a huge wordlist, the size of the content is another thing to consider.
You can set content lengths to be ignored using the --ignore-length flag, which accepts values such as 100-105 or 1234. Combinations are also possible, such as “123,34-53”.
Wildcard redirects can be a big problem in some very dynamic applications, usually wildcard redirects are a bad idea, so Shadow-Spotter is configured to detect them by default.
You can disable automatic detection by setting the --wildcard-detection flag to “false”
Probably the most useful filters for the success of our test are the status code filters.
By default Shadow-Spotter sets the following HTTP codes as success codes: 100, 200, 300, 301, 302, 401, 403, 405, 500 this means that only requests that return these codes will be shown to the user.
You can specify new codes with the --success-status-codes flag.
Note: don’t leave a space between codes, otherwise the status codes won’t be processed correctly…
However, the --fail-status-codes flag does the opposite, allowing the user to define codes to be treated as failures instead of successes, overriding the --success-status-codes flag.
Note: don’t leave a space between codes, otherwise the status codes won’t be processed correctly…
Let’s say we have an application that only responds to the POST method, but our wordlist is full of GET, PUT, DELETE… what if we wanted to force tests to use only the POST method, but without changing or reworking the wordlist? Well, it’s easy: just use the --force-method flag that was disabled (intentionally) in kiterunner, we have fixed the flag and we have implemented the new operation logic.
Redirects
We mentioned wildcard redirects, but there are other parameters we’d like to control at some point…
The --blacklist-domain flag allows us to define one or more domains that we don’t want to follow… this can prevent us from wasting time with WAFs and redirects to error pages that many commercial APIs use.
If the application you are testing uses a lot of redirects that are essential for your tests, you can use the --max-redirects flag to control this. By default, Shadow-Spotter only follows 3 redirects at time.
Replaying requests
The ability to repeat requests is very useful because it enables our users to align Shadow-Spotter with tools like ZAP and quickly move their test from the scanning phase to the exploitation phase…
It’s also very useful for testing high-security systems, where you have to test practically everything as “manually” as possible due to an incredible rate-limit.
Let’s take for example that our scan returned the following route:

We know it’s the POST method, so some parameter is supposed to be in the body of the request… how do we check for that?
To do this, let’s use the replay subcommand of the kb command…
We can use the replay subcommand in two ways, the first and most common way is to pass the entire line of the scan result as an argument.
Shadow-Spotter kb replay -w simple-api.kite "POST 200 [ 82, 9, 3] http://127.0.0.1:5000/user 129bccb176b440056aac6c42f7a30b3b26530852"As you can see, it is necessary to pass the wordlist used - after all, Shadow-Spotter needs to identify the API and the route with the appropriate parameters…
The second way to execute the replay subcommand is to use the simplified syntax, which is essentially designed to be used by automation scripts.
Shadow-Spotter kb replay -w simple-api.kite 129bccb176b440056aac6c42f7a30b3b26530852 POST /user
"http://127.0.0.1:5000"
The correct sequence of the simplified syntax is: <ksuid> <method> <path> <host> don’t forget to add flags like --header, -w… at the beginning to avoid confusion…
The result of any of the above execution methods will be something like:

In order to integrate replay into ZAP you just need to set the proxy using the --proxy (-p) flag.
At the time of writing, ZAP has a catastrophic BUG in the HUD when used without a browser. The particular BUG will cause a method validation failure, for example, the POST method may be changed to GET, which would cause the request to fail.
So remember to disable the HUD when you’re not using ZAP in your browser.

By now, you should have the mindset you need to perform advanced content discovery using Shadow-Spotter…
Shadow-Spotter is constantly evolving and SNAKE Security is committed to keeping the system up to date, always Free and Open Source!
Take care! See you soon!